Lotus Elise Side Skirts Installation.
Tools and items needed. 1/8" drill bit. Rivet gun, black primer,
glaze, 220-320-600 sand paper, trim paint or semigloss paint, 1/8 rubber
sealant (optional), glazeUnfinished install
instructions.
1-The side skirts come as a pair so there is a left side and right side.
2-When the come out of the mod they will have some wax on them. You will
need to remove this. You can use hot water and dish soap. You can also
use denatured alcohol if you like. Make sure they are good and clean
before you start.
3- Look over the skirts. Depending on how it came out of the mod will
depend on what you need to do. Some come out with almost no
imperfections, while others may have some standard spots to fill. This
is the same with all fiberglass products that come out of a mold so if
you have used them before then this will be similar.
4-Sand the side skirts down. I would say use some 220 or 320 grit black
sand paper. You can do this either wet or dry. Dry will use more
sandpaper, but goes quicker as you do not have to wait to let it
dry. Wet you save sandpaper. The good thing is that these items are not
that big.
5- When sanding is done look over the skirts. Any spots that have
dimples or imperfections you can use glaze to fill. If you want you can
get the two part glaze that dries quicker and harder. The only downsize
it is harder to sand, but we are only talking about the side skirts so
it is not that bad. If you want to use bondo to fill the small holes
that will also work.
6- Final sanding before paint. Use 600 grit for a nice smooth finish.
7-When final sanding is done clean it off good.
8-Paiint with primer. I would suggest black primer as it shows if you
missed any spots and almost all customers will be using black color when
done.
9-When primed let it dry and look at it to see if any spots need some
additional touch up.
10-Do the final painting. I find that trim paint works well and sprays
on nice from a spray can. You can also use some semigloss spray paint to
get good results.
11-Let it dry well.
12-Paint the alum plate for the back in black if you like so it matches.
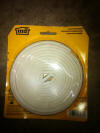
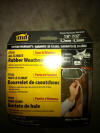
13-Optional, but highly recommended. You will need to purchase some 1/8"
rubber weather stripping. You can get this from Lowes or Home Depot and
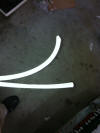
it only costs like $5. It comes in a double strip and you can easily
take it apart. It has a backing that is adhesive for sticking to the
skirt. What you can do is have one end held on the ground with some type
of weight and then hold the other end. Spray with the trim paint or
whatever finishing paint you plan to use. Let it try then install it on
the side skirt where the skirt will be touching the body of the car.
This prevents any type of gap and does not let little tiny pebbles get
into the gap. It makes for a nicer finished also when done. See the
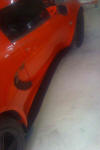
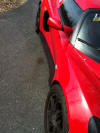
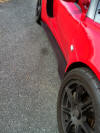
pictures below. Now you are ready to install them on the car.


Install into the car instructions.
14- Jack up the car on one side and get it as high as you can go to have
room. Be careful to make sure you are using the jacking points and
distributing the load well. Also, use jack stands, be safe.
15- Remove the rear wheel. This is so you can install the alum plate in
the back.
16- Put the side skirt up onto the car to make sure it fits well and you
get a feel for how it will go on.
17- Use a 1/8" drill bit and start at the front. This is best to have a
friend help and hold it in place. Drill the hole and then put the rivet
in. Work you way down the car and install about 8-10 rivets to hold the
side skirt to the body.
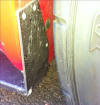
18-Now you will need to install the alum plate. You can drill out the
1/8" holes before you install. See picture for location holes for
drilling. The one will be the bottom corner. I would suggest drilling
out the holes first and then putting it on the car. Now you can align it
to the car and drill the hole through the side skirt side and rivet in
place. Now drill the rest of the holes through the body and rivet in
place.
19- Repeat to other side of car.


|
