        
Car specifications:
Car: 1991 Toyota MR2
Engine: Toyota Camry 1MZ-fe
Transmission: 1991 Toyota MR2 S54 5 speed stock
Flywheel: 2000 Toyota Camry Solora 1MZ-fe manual
Clutch pressure plate: 1991 Toyota 3SGTE
Clutch disc: 1991 Toyota 5SFE disc
Engine mounts: Stock MR2, pass side fabricated
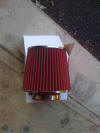
Air Filter: Ebay special
Oiling system: Accusump 2 qt
Oiling line: An fittings and oil sandwich adapter
Wheel: Blitz 17x8 35mm offset
Tires: Dunlop Dierzza star spec 235/40/17
Brakes: 1991 Toyota MR2 stock front and back
Brake lines: Goodridge SS lines
Brake fluid: Super Blue
Brake Ducts: Dual 3" HVAC vents per front wheel
Master Clyinder: 1991 Toyota MR2 non abs stock
Exhaust: Stock Y pipe 1MZ-FE 2.5" after no cat
Exhaust muffler: Cherry Bomb 2.5" in out from Pepboys
Fuel pump: 1991 Toyota MR2 stock
Electrical: 95 Camry matched to 91 MR2 spliced and diced
Seat: Sparco Evo
Seat Belts: G force cam lock pull up
Roll Cage: 1-3/4 .120 thick
Cool Suit: Fast shirt with custom cooler and pump
Exterior body: Camry portion front bumper
Exterior T-Tops: Camry hood cut up and welded to top
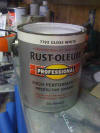
Exterior paint: Rustoleum paint
Fuel jugs: 5 gallon VP fuel jugs
Lighting: 4x 6" driving lights with 35 watt HID kits
Short history-
We did our first Chump race in Sebring Sept 2010 and did a total of 4 laps
until the engine blew up. Upsetting to say the least. We cracked
a rod into pieces and my thinking is that it was due to a very long
right hand turn at higher G levels causing the oil to go to one
side and no oil pressure. This is a common issue with the 1MZ
engines. We fixed this buy getting an accusump system off ebay
and putting it in the car. We hope this will fix the problem for
the future. We did a auto insurance salvage vehicle for $250,
pulled the motor and brought it to a salvage recycler and got
$191. Now that is the way to get a cheap engine. Here are some
pictures of the blown engine. With the connecting rod snapped it
still ran enough to get onto the trailer and I am amazed it did
that.


The how to do it for $500. And yes it can be done, almost,
I have spent $550 to do it. First, read all the rules. Here
are some pics of the car in different stages of completion.
1-There are two ways to buy a cheap MK2 MKII. One is to buy
one that was in an accident. Most people just have liability on
the insurance for these so once they are in a small accident it
is not worth fixing. You can get one cheap. The NA ones are the
best to get as the turbo cars are still worth to much. The other
method is to buy one with a blown motor. These can also be found
pretty easy. When the engines get some mileage on them they
start to burn a bit of oil. Since it is an MR2 some drivers like
to corner hard. When this happens they starve the engine for oil
and kill rod bearings. You have a decent car with a blown motor
that will cost more to fix than it is worth if you do not do all
the work yourself. This is the route I went. I got the car for
$800 with a blown motor and electrical that is not working for
some reason.
2-Sell all the parts off the car you can to get back your
money. Some of the items are listed below are what I sold, but
you could sell more. Think that if it is good condition you can
probably sell it. I should have about $1100-1300 in parts sold
when done. I got the car for only $800 so this works out great.
See the list below for details on what was sold.
3-Now what. I have a blown engine in the car that is stripped
with a zero value. Find yourself a new used engine. Sound simple, but
you can not spend more than $500 on the parts to make it hole
again. That is the trick. Now a 5sfe can be a cheap motor so
look around and you should be able to find one for less than
$500. www.Car-Parts.com
is a good place to find items. What I did was buy an entire car
from an insurance salvage auction. I got a 1994 Toyota Camry for
$250. I got it cheap because it was really damaged and was also
a biohazard car. This means there is some blood and possible
other things in the car. I only found blood, but to be honest I
was not really looking all that hard to find extra stuff. I
wound up bidding on two Camry's at the same basic time and put
in bids for both to max out at $400. I wound up getting both (my
wife is not happy). Now that I had the car I stole every nut,
bolt, hose and clamp off the car for the race car as either a
spare or to use. This has come in so handy when needing a bolt
or nut, but is so worth it.


4-OK, but the Camry has a V6 instead of a 4cyl engine. Not a
problem. We can adapt it and make it work, we just have to be
careful not to spend too much money doing it. You only need a
few parts to make it work. First, you need to start out with a
1991 MR2 NA with manual transmission. This will come with the
parts you need to make it simple. You will need a flywheel from
a 2000 Toyota Solara Manual trans 1mzfe motor. I got mine on
www.car-parts.com for
$25. You might be able to talk someone cheaper if you try. I
have also read you can use a 3sgte flywheel and modify the bolt
holes, but have not gone this way as just buying the 1mz is fine
for me. You
can also take some of the old Camry items that are not needed
and trade. You can think about trading the cat and transmission.
I tried this at my local yard but they would not take it
thinking I stole the car and selling the parts. The next thing
you will need is a 3sgte pressure plate. A stock one will work
fine. People with turbo cars are always putting in stronger
clutches and have stock ones sitting forever. You could find one
for free if you look. I did not feel like trying
that hard so I bought one for $15 shipped. You will also use the stock
5sfe clutch disc. The one in the car was OK for me so I used
that. If that one is not good you can also look for a used
clutch disc on the sites. The other items you will need if you
take off the AC compressor is a shorter alternator belt. I
brought my stock 6 rib belt in and they found a 36" long one.
That cost me $16.25. Ouch, I never thought little amounts of
money would hurt, but I need to keep this price down so I need
to worry. I had to modify the bracket to move the alternator
low enough to make it work, but all is good as it does. The
motor is held on by 4 engine mounts, 3 on the transmission and
one the passenger side of the car. The three on the trans you
will just use the stock ones. The passenger side one needs to be
made. I used half of the stock 1MZ mount, mounted a plate to it,
drilled some holes in to so the stock MR2 mount would slide down
on it and bolt it up. The only issue is the mount has a big bolt
that goes through and does not line up now. It is too high. I
make up some brackets for the sides, bolted it up, welded it up
and I am good to go. I made this all of of my bucket of scrap
metal. Got to love it, I just hope it holds up. On the cooling
system I just used all the stock MR2 and Camry hoses. There is a
U shaped pipe in the MR2 that goes around the gas fill area. I
just took that out and cut pieces off of it to make my
extensions. I also cut some hoes to make 90 degree bends as
needed. This worked out well and I had everything I need there.
I also purchased an air filter off ebay for $2.49 so that is
going on there, but it does look almost too nice. I might pain
the chrome black to match the engine better.


5- Engine is installed, now what. Tons! You will need to make
up an exhaust. Per the rules you can have an exhaust from the
header back as free. I used the stock headers. I took the stock
Y pipe and cut it so I had something to start with and did not
have to make flanges to work with the headers. This saved me
time. I had to modify the one engine mount on the rear of the
trans to make it clear, but they worked. The only issue is the
rear header is facing forward and we need to go back to get the
exhaust out. I put it forward and turned it into the main pipe.
I went form the stock Y pipe diameter to 2.5" piping. Why you
ask? Because that is what I had in the shop at the time, I had
lots of scrap piping in that size and it did not cost me
anything. I know if you look at it you will say I am loosing all
this HP due to the design, but this is a $500 race car so I am
just worried about getting it running. I also used a 2.5" flowmaster muffler, why again, because I had one sitting in my
crawl space for about 10 years and it was free. Who knows what
it will sound like? Mustang? As long as it is pretty quiet I am
OK with it. I do not want a really loud car that will give me a
head ache. I also used some hanger I bought from Pepboy for a
few dollars, but was told by my buddy that they will not pass
tech. I took them off and put on some stock ones that are way
stronger and should not fail. I am glad I did this now that it
is done and less worries. Exhaust done, yahoo. Update to the
muffler. I had to ditch the flowmaster because it was too loud
when my cop brother in law came over with his sound meter. 102db
at 50 feet. I went to Pepboys and picked up a regular muffler
for $30 and we have a nice quiet car. I think too quiet, but it
is all good.


6- Fuel system- Now I wanted to use stock as much as possible
just to keep it simple and save. When using a 94-96 Camry is has
the same return style fuel system as the MR2. The only thing I
bought was a new fuel filter that was the original on the car. It
was so rusted and old I did not trust it and I really do not
want to catch on fire in the car. The Camry fuel line is to
short to fit, but what I did was move the fuel filter closer and
made a bracket. The return line was not long enough also, but
what I did there was use part of the hose from the 5sfe engine
to adapt it up. This line is not under pressure so you can
splice it in. Also, when the engine was out I drilled out the
fuel inlet line so a bigger funnel can get in there of fuel
faster. All done and easy.
7- Electrical- UGGGG- I have downloaded
the manual from a 94 Camry and others from the message board
www.MR2OC.com and have to
spend some time doing it all. Fun. So the car runs and works
good now. The electrical was a pain, but we went through each
wire in the harness, highlighting as we go and connecting what
needs connecting. It now works. It is not as clean as most
peoples, but we got it to work with what we had. If I did it
again I am sure it would be much nicer, but hey, it works so I
am happy.


8- Strip that car. Strip out everything you do not need. This
will make it simple, get the weight down and make it a race car.
I stripped the interior first. I took out the carpets, complete
interior including the AC/heater core/blower unit. This saved
some weight and keeps it simple. I also traded the complete
doors with all power and glass to someone who has gutted doors.
No reason to ruin a good set of doors when there are ones out
there, plus he gave me $150 for each door. Wahoo, extra cash to
keep the car value to zero. I also traded the fenders. We all
know the fenders are going to get a little ding here and there
so no reason to ruin a good set.


9- Interior- I had an old set of Sparco Evo seats that were
used only a few times so I put them in the car. We used a Sparco
Sprint seat in the other car and that is really not a good seat.
We have also used a Kirky road race seat and that is much
better, but I like the sparco evo's best for fitment. On the
driver's side I used the stock rails cut from the stock seat and
mounted large metal plating to bolt down the seat. This makes it
so short people like myself and taller people will all be able
to adjust it to their needs. It is all welded up and I am not
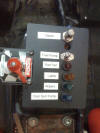
worried about where it is going. I will have a 4 prong safety
switch in the car. For now I am keeping the stock headlights and
controls on the steering column, but that might change once it
is closer to getting done.


10- Wheels, Tires and Suspension- I got a set of messed up Blitz 17x8
40mm offset wheels for $200. The tires are all junk, not that I
wanted them anyway. One wheel has a crank on the back side that
needs to be welded, but it still holds air. These are a great
find for the size, fitment and cost I wanted. I just need to
clean them up to make them look a little bit ok. I plan on using
235/40/17 on all four corners. This way if we are using up the
rears more than the fronts we can switch them out and get a lot
more life out of the tires and this will save us some money.
They looked really bad, but I took a wire brush wheel on an air
tool and they actually looked pretty good. On the suspension the
car came with Megan coil-overs on it, but are just too nice for
lemons racing and would probably get some nice penalty laps,
plus I could use the money from selling them for the car. I just
got a set of stock setup that was used and sitting around.


11- Brakes- The stock brakes work fine, but having 20 year
old ones scares me. We have had problems of calipers locking up
and other brake issues in the past. I am the biggest wimp even
when I can not trust the brakes. We got all new
rebuilt calipers, rotors, SS brake lines and some really good brake
fluid. We used HVAC 3"ducting and it works great. One on the
caliper and one on the rotor. I will also use Porterfield pads and the
endurance ones so they last. This worked really really well on
the other MR2.


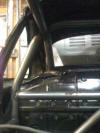
12- Roll Cage- This roll cage will be made from 1.75" x .120"
tubing. I could use 1.5", but the 1.75" is stronger and better.
I am getting a weld in cage from Roll Cage Components. I am
taking my car down there and he will fit it the car to make sure
it is just right. He will use this for kits for future
customers. These are super nice and a great price.
http://www.rollcagecomponents.com/kits7.htm




13- Safety items- Seat Belts. We will use the cam lock system
that is pull up. This is much nicer and better. You want to have
a tight harness so this is the one to get. It only cost $150 and
comes with everything needed.
http://www.safedrives.com/proddetail.asp?prod=GF-C7000/7100&cat=52
We have a 2.5lb fire extinguisher in the car. This is simple and
bolts up nice. We are using my old Sparco Evo seat. It fits very
nice and is safe. We also moved the steering wheel 2" back for
better fitment to help with arm fatigue. Who knows what type of
steering wheel it is as it is pinkish red and donated by Kevin.
Hey, it works. We are using a cool suit system and it makes a
huge difference when hot. We modified the fuel jugs with longer
necks. This way you can just put the end in the fuel hole and
then pick up the can. Much safer and easier then doing it at the
same time. We can have one person do the filling now instead of
two and that is much much nicer. After driving around with bad
mirrors we got a nascar style convex mirror that mounts to the
roll cage. Oh it is nice to see again.


15- Exterior and theme. I sold the doors, hood and fenders
off the to car and got some banged up ones for the race car. No
point in ruining good body panels when you can sell them and
they are just going to get busted up anyway when racing. I also
took the banked up camry hood, cut it up and welded it to the
roof to cover up the t-top holes. Per the rules the car should
be covered and if it does rain I do not want to get wet. I also
took what was left off the hood and make some light covers for
the front with rivets to hold it on. This is why it is so
important to get the complete donor car so you can use all the
extra items from it. Be creative. I got a couple of spray
cans of primer and then used some rustoleum from Lowes through a
spray gun. A very cheap way to paint the car and it looks pretty
good from a distance of like 40 feet and farther. I took the
front bumper that was split from the camry and cut it up for the
front bumper on the MR2. The MR2 bumper was missing the bottom
so I just matched it up and zip tied the camry portion to it. I
know I should have looked at it better because the one side is
all crocked compared to the other, but it is a $500 race car so
I am just happy it is there. This is what happens when I was
bored one night and tired of working on the lights. I also took
the camry embloms and put them on there.




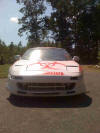


16- Lighting- I just upgraded my lighting in the car. We now
have 4 35 watt HID lights. We are only allowed 4 lights of 55
watts or less or 35 watt HID. I have a set of HID's on my daily
car and they are amazing. The worse thing in the world is
driving fast, in the dark, with other cars and you can not see.
This issue is fixed now. I just bolted them to the car and use a
trailer plug on them. It works really well and I am super happy
with the results. I got the driving lights off ebay for like $60
for a set of 4 and the HID kit are $35 shipped for a pair. The
kit is for H3 bulbs and works great. You can see the comparison
below of brightness and how bright at night. Still need to
adjust them a bit, but you can see it is nice.


|


